How to Prepare Your North Oakville Home for Sale
A phase-by-phase staging and prep checklist for North Oakville home sellers: deep cleaning, repairs, staging tips, and curb appeal that actually sells.
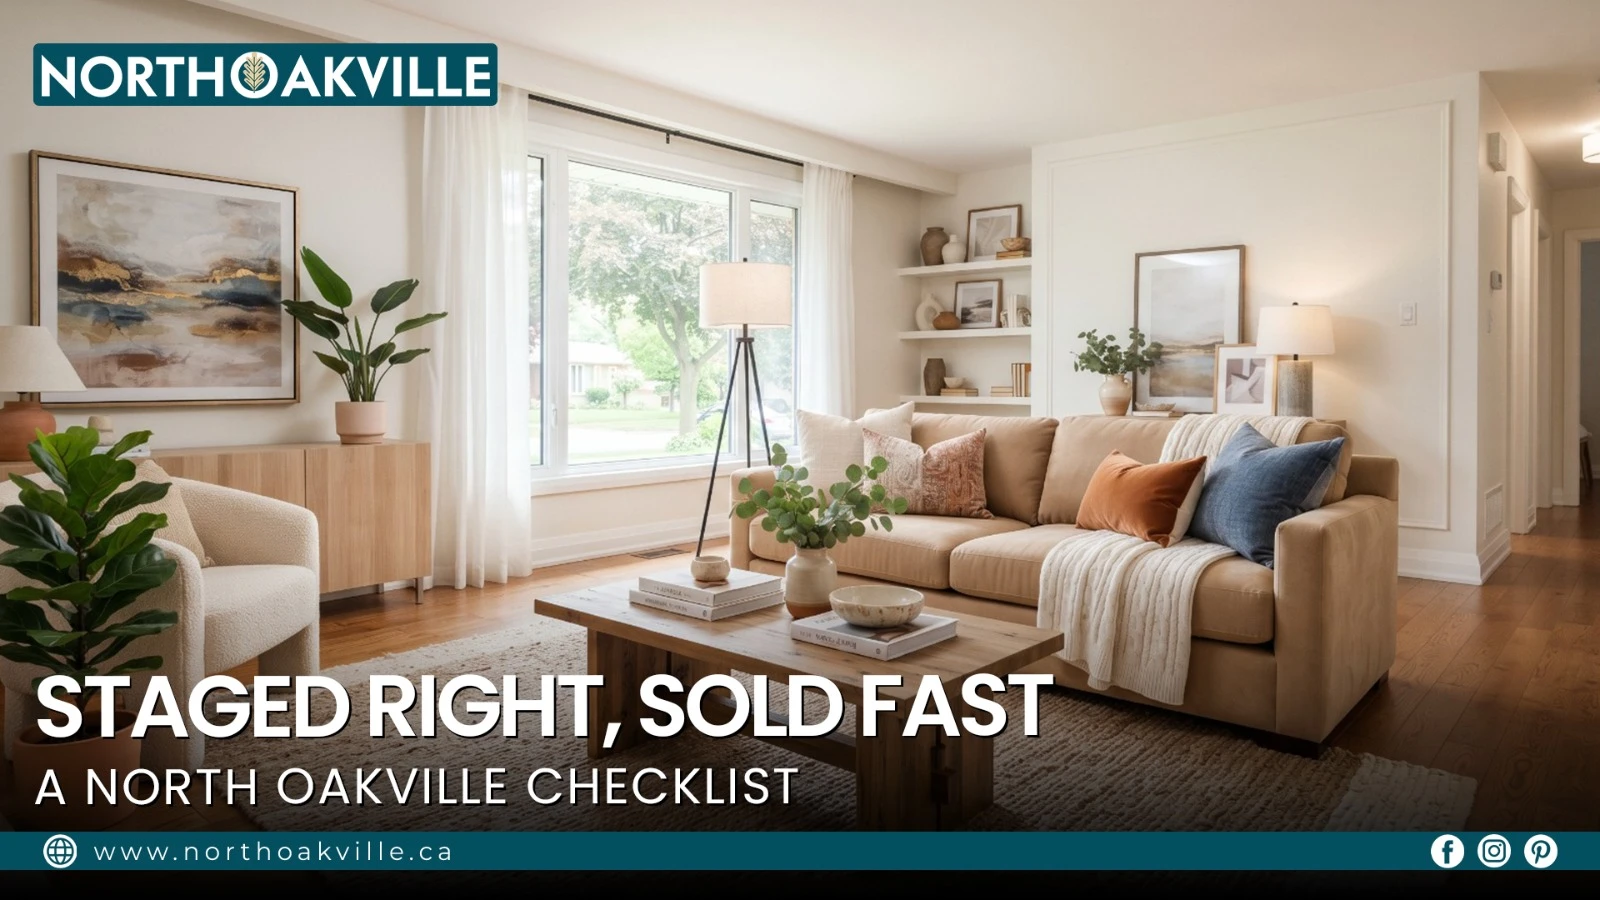
The first seven to ten seconds a buyer spends looking at your home, whether that's pulling up to the curb or scrolling past your listing photo, do most of the heavy lifting in a sale. In a market like North Oakville, where buyers are used to touring pristine new-construction show homes, a resale property that looks "lived in" rather than "move-in ready" can quietly lose ground before a showing even starts. This applies whether you're a growing family upgrading to a bigger space or empty nesters downsizing into something more manageable. This guide walks through a full staging and prep checklist, phase by phase, so your home shows at its absolute best.
Why Staging and Prep Actually Matter
Skipping prep work is one of the most common ways sellers leave money on the table. Industry data from groups like the National Association of Realtors and the Real Estate Staging Association consistently shows that staged homes tend to sell for more than comparable unstaged homes, commonly cited in the range of 1% to 10% above what an unstaged version of the same home would fetch, with higher-end markets sometimes seeing an even larger gap. Staged homes also tend to spend less time on the market, since buyers respond faster to a home that already looks like a finished product rather than one they need to renovate mentally.
The exact numbers vary widely by study and market, so treat any specific ROI percentage you read online with some skepticism. What's consistent across nearly every credible source is the direction: presentation genuinely affects both price and speed of sale, and in a premium market like North Oakville, that gap tends to matter more, not less.
Staging vs. Basic Cleaning: They're Not the Same Thing
It's worth being clear on the difference before you start, since sellers often do one and assume they've done both.
Cleaning and decluttering is about subtraction: removing distractions, personal items, and excess belongings so the home reads as neutral and spacious. Staging is about addition: arranging furniture, lighting, and decor so buyers form an emotional connection and can picture their own life in the space. A home can be spotless and completely decluttered and still feel cold or forgettable without staging on top of it. Most successful listings do both, in that order.
Phase 1: Deep Clean and Declutter (6 to 8 Weeks Before Listing)
This phase does the most good the earliest, since it also gives you time to catch and address anything a home inspector might flag later.
Start with a pre-listing home inspection. Catching a furnace, roof, or plumbing issue on your own timeline is far better than having a buyer's inspector find it during a conditional offer, where it often gets used as leverage for a price reduction well beyond the actual repair cost.
Declutter with a clear system. Sort everything room by room into keep, donate, sell, and toss piles. Rather than shoving extra belongings into the garage or closets, move 30 to 50% of your total belongings offsite, whether that's a temporary storage unit or a portable container. Buyers open every closet and cabinet, and a packed closet signals "not enough storage" even if the real issue is just too much stuff.
High-scrutiny areas deserve extra attention. Kitchens get checked inside the oven, fridge, and under the sink. Bathrooms get judged on grout, soap scum, and faucet buildup. Floors and baseboards get noticed because buyers spend a lot of a showing looking down as they walk.
Handle odors at the source, not with a cover-up. Heavy air fresheners or scented candles right before a showing tend to make buyers suspicious rather than reassured, since it can read as masking a problem like mold or pet odor. Natural alternatives like activated charcoal in closets, a baking soda and essential oil treatment on carpets and upholstery left to sit before vacuuming, or simmering a vinegar and water mixture to neutralize cooking smells tend to work without raising red flags.
Depersonalize, but don't sterilize. Pack away family photos, personal collections, and anything overtly personal, since these can make buyers feel like guests rather than future owners. That said, a completely stripped, hotel-lobby feel can backfire too. A few curated, neutral touches, like a stack of design books or a bowl of fresh fruit, keep the space feeling warm rather than abandoned.
Phase 2: Minor Repairs and Maintenance (3 to 4 Weeks Before Listing)
Small, visible flaws do disproportionate damage to how buyers perceive a home's overall condition, since they tend to assume a few visible issues mean there are more hiding out of sight.
Fix the things that read as bigger problems than they are. Water stains, even old and fully dried ones, suggest an active leak. Flickering lights or loose outlets raise electrical safety concerns. Stuck windows or doors that drag against their frame can make buyers suspect the foundation has shifted. Cracked or missing caulking around tubs and showers suggests hidden water damage. All of these are usually inexpensive to fix but expensive to leave unaddressed.
Repaint in warm, neutral tones. Fresh paint is consistently one of the highest-return cosmetic updates available. Overly bold or unusual colors can actively hurt a sale; research from sources like Zillow's buyer behavior studies has found that certain shades, like a dark, mustard-toned yellow, can measurably lower buyer offers, while warmer neutral tones and soft, grounding colors in bedrooms and living spaces tend to perform well. When in doubt, stick to warm whites, soft greiges, and other broadly appealing neutrals in main living areas, and use a satin or semi-gloss finish on trim and bathrooms for durability, with flat or eggshell on walls and ceilings to hide minor imperfections.
Update small hardware and fixtures. Swapping dated cabinet handles, replacing mismatched or yellow-toned bulbs with neutral LED lighting, and tightening loose doorknobs cost very little but make a home read as far better maintained.
Confirm major systems work. Have your HVAC serviced and make sure it's in good working order before showings start. A buyer who feels a draft or hears a strange noise from the furnace during a walkthrough will remember it.
Know what to skip. A full kitchen or bathroom gut renovation right before selling rarely returns its full cost, and your design choices may not match what the eventual buyer wants anyway. The same goes for high-end smart home systems or elaborate landscaping features. Save major renovation dollars and focus on the smaller, high-impact fixes instead.
Phase 3: Strategic Staging (1 to 2 Weeks Before Listing)
This is where the home shifts from "clean" to genuinely appealing.
Decide between DIY and professional staging. DIY staging can work well for homes that are already modern, well-maintained, and mostly need decluttering and rearranging, particularly for more affordable price points. For vacant properties, dated furniture, or higher-end homes, a professional stager tends to be worth the investment, since they bring in furniture scaled specifically to your rooms and styled to match what buyers in that price range expect.
Edit furniture deliberately. As a general guide, removing roughly a third of the furniture from each room opens up visible floor space. Keep a clear walking path of at least a few feet through every room and doorway, and pull furniture slightly away from the walls rather than pushing everything flush against them, which tends to make a room feel more open rather than less.
Give every room one clear focal point. In a living room, that might be a fireplace or a window view rather than the television. In a bedroom, it should be the bed itself.
Layer your lighting. A single overhead light creates flat, unflattering shadows. Combining ambient lighting (ceiling fixtures), task lighting (lamps, under-cabinet lights), and accent lighting (sconces, smaller lamps) creates a warmer, more dimensional feel. Keep bulb temperatures consistent throughout the home, generally in the warm white range, rather than mixing cool and warm bulbs.
Take vacant homes seriously. Many buyers genuinely struggle to judge scale in an empty room, and every small flaw becomes more noticeable when there's nothing else to look at. If your home is vacant, staging tends to matter even more than in an occupied home, not less.
Consider virtual staging for online listings, not as a full replacement. Virtual staging (digitally furnishing photos of empty rooms) is inexpensive and can boost online engagement, but it risks disappointing buyers who show up to an empty house after seeing furnished photos online. In a market where buyers expect a polished, in-person experience, physical staging remains the stronger choice for the actual walkthrough.
Phase 4: Curb Appeal (Final Days Before Listing)
Address the exterior basics. Mow and edge the lawn, trim overgrown bushes, clear walkways of debris, and power wash the driveway, front porch, and any hardscaping. These are inexpensive fixes that remove years of accumulated grime and make the whole property look freshly cared for.
Treat the front door as a focal point. A fresh coat of paint on the front door, in a confident but tasteful color, along with modernized house numbers or a mailbox, gives the entire front facade an instant lift and tends to return more in perceived value than its actual cost.
Adjust for the season. In spring and summer, keep the lawn edged, add symmetrical potted flowers at the entry, and sweep away pollen and debris daily. In fall and winter, prioritize keeping the driveway and front steps completely clear of snow and ice, and add warm exterior lighting given how early it gets dark, along with simple winter greenery like an urn with evergreen branches to keep the entrance from looking bare.
Don't overlook the moment before the door opens. While an agent unlocks the door, buyers are standing on the porch with nothing to do but look around. Cobwebs, a dirty door handle, or a worn mat all register in those few seconds, and a flawless entrance sets a subtle but real expectation for what's behind the door.
Getting Ready for Photography and Showings
Your online listing photos function as the actual first showing for most buyers, since the overwhelming majority of home searches start online. On the day of photography or a showing, a fast reset checklist helps:
Hide trash cans, laundry baskets, and pet bowls or beds out of sight
Clear kitchen counters of dish soap, small appliances, and anything not purely decorative
Close toilet lids, remove bath mats to show off flooring, and hang two matching, fresh towels
Turn on every light in the home, including lamps and under-cabinet lighting, and turn off ceiling fans so blades don't blur in photos
Open every blind and curtain fully
Move all vehicles away from the house, not just out of the driveway but off the street directly in front of it too
For larger North Oakville lots, ravine-adjacent properties, or homes near trail systems and green space, aerial or drone photography can be worth the added cost, since it captures lot size, proximity to natural areas, and neighbourhood context that standard ground-level shots miss entirely.
What North Oakville Buyers Specifically Expect
Because North Oakville is dominated by newer, master-planned construction, many resale buyers here have spent time touring pristine model homes and recently built houses before ever looking at your listing. That comparison shapes their expectations.
Buyers in this market tend to expect a genuinely move-in-ready home: clean sightlines, bright rooms, and no obvious deferred maintenance. A home that feels dated or worn by comparison to the newer builds nearby can lose momentum quickly, even if it's priced fairly.
Because many North Oakville neighbourhoods share similar builder floor plans, differentiation on presentation matters more here than in areas with more architecturally varied housing stock. Swapping standard builder-grade light fixtures for something more distinctive, especially in dining rooms and entryways, is a relatively low-cost way to stand out. Serious buyers who've already sorted out their mortgage pre-approval tend to move quickly on a home that shows well, so a polished presentation is often what turns a strong offer into a fast, firm one. A finished basement or a landscaped, usable backyard is also a genuine differentiator, since many newer North Oakville homes still have unfinished basements or bare backyards straight from the builder. If yours is finished, showcase it heavily rather than treating it as an afterthought. Highlighting proximity to strong school catchments, trails, and community amenities in your listing description also tends to resonate with this buyer base specifically.
Budgeting for Staging and Prep
As a general guideline, sellers are often advised to budget somewhere in the range of 0.5% to 1.5% of the home's value toward staging and pre-listing preparation, though this varies widely depending on whether the home is occupied or vacant and how much of your existing furniture can be used.
Staging an occupied home, where a stager supplements what you already own, tends to be considerably less expensive than furnishing a vacant property from scratch for a month or more. Whichever route you choose, it's worth thinking of the expense as protection against a stale listing and price reductions down the line, rather than as a pure cost.
On whether to hire a staging company versus buying furniture yourself: for most sellers, hiring is the more practical option. Buying a full set of staging-appropriate furniture independently often costs more upfront than a staging rental, and reselling it afterward rarely recovers the full amount. Professional stagers also handle delivery, setup, and removal, which matters when you're already managing the rest of a move.
Common Mistakes That Hurt a Listing
A few recurring mistakes show up again and again in listings that underperform:
Dumping clutter in the garage. Buyers check garages closely, especially in a market like North Oakville where storage and parking are genuine selling points. A crammed garage undercuts the very storage capacity you're trying to demonstrate.
Leaving closets packed. An overstuffed closet reads as "not enough storage," even if the real issue is just too many belongings still in the home.
Relying on air fresheners instead of fixing the source of an odor. As mentioned above, this tends to raise suspicion rather than reassure buyers.
Partial staging. Staging only the main floor while leaving upstairs bedrooms or a basement untouched creates a jarring contrast that can make the unstaged areas look neglected by comparison.
The Risk of Over-Improving
There's a point where spending more on prep stops paying off, and it's worth knowing where that line generally sits.
Major renovations completed right before a sale, like a full kitchen gut or an in-ground pool, typically return well under their original cost, since design choices are subjective and a buyer factoring in the cost of undoing something they don't like will simply offer less. There's also a practical ceiling set by your neighbourhood: no matter how much you invest, comparable sales in your immediate area put a cap on what an appraiser and buyers are realistically willing to pay. If the highest recent sale on your street was well below what a major renovation would require to break even, that renovation likely won't pay for itself. Cosmetic, lower-cost updates almost always outperform large structural or design overhauls in the final weeks before listing.
Coordinating Vendors: The Right Order
Managing painters, cleaners, stagers, and photographers can get chaotic if they're not sequenced properly, since each one generally needs the previous step finished before they can do their job well.
The general order that works best: handymen and painters first, since dust and wet paint need to be fully resolved before anything else happens; deep cleaners next, working faster and more effectively in an empty, freshly repaired space; the staging team after that, once the home is spotless; and photography or videography last, once furniture is in place and the home is completely quiet and vacant of other workers. Your listing agent can usually help coordinate this timeline and often has a trusted network of vendors already in place, which saves you from vetting everyone from scratch.
Timing Your Sale in North Oakville
While homes sell throughout the year across the GTA, North Oakville tends to see two clearer peak windows. Spring, roughly from late winter through April, is typically the strongest period, driven by families wanting to close and settle in before the new school year. A second, smaller wave tends to pick up in early fall, as buyers who spent summer travelling re-enter the market with a similar urgency around timing before winter. August and December tend to be the quietest stretches, as vacations and holiday schedules pull buyer attention elsewhere. None of this means a home won't sell outside peak windows, but it's worth factoring into your own timeline if you have flexibility on when to list.
Final Thoughts
Preparing a home for sale in North Oakville isn't about spending the most money possible; it's about sequencing the right work in the right order and understanding what this particular market's buyers are comparing your home against. Deep clean and repair first, stage deliberately, present the exterior well, and time your listing sensibly, and you'll put your home in a genuinely strong position without overspending on renovations that won't pay for themselves. When in doubt, lean on your listing agent's experience with what's actually moving in North Oakville right now, since local buyer expectations shift over time even when the underlying prep principles stay the same.
Staging costs, market conditions, and seasonal trends shift over time. Confirm current recommendations with a licensed real estate agent or professional stager before making major decisions.
FAQs
What is the most important room to stage when selling a house?
The living room is generally the highest priority, followed closely by the primary bedroom and the kitchen, since buyers spend the most time evaluating these high-traffic, lifestyle-defining spaces.
Can you live in a house while it's staged for sale?
Yes. Many sellers stay in their home throughout the staging process using an "occupied staging plan," where a stager works with your existing furniture and you maintain a disciplined daily routine of tidying before showings.
What should you remove from a home before photography?
Family photos, pet beds and bowls, bathroom toiletries, small kitchen appliances, and trash cans should all be cleared away so every room photographs as clean, neutral, and depersonalized as possible.
How much value does staging actually add to a home?
Estimates vary by study and market, but staged homes commonly sell for somewhere in the range of 1% to 10% more than comparable unstaged homes, with premium markets sometimes seeing an even larger gap.
Does an empty house look smaller than a staged one?
Yes, generally. Without furniture to establish scale, most buyers find it genuinely difficult to judge whether their own furniture, or even a bed of a certain size, will actually fit in the space.
Does staging a house actually help it sell?
The overwhelming majority of industry data says yes: staged homes tend to sell faster and for more than unstaged homes, and buyers' agents consistently report that staging makes it easier for buyers to picture themselves living there.
What should you not do when prepping a house for sale?
Avoid over-renovating rooms right before listing, masking odors instead of fixing their source, dumping clutter into the garage or closets, and staging only part of the home while leaving other areas untouched.
How can I stage a house on a limited budget?
Focus on decluttering, deep cleaning, fresh neutral paint, and lighting fixes first, since these are the lowest-cost, highest-impact changes. Supplementing existing furniture with a few rented or borrowed pieces is generally far cheaper than furnishing an entire vacant home.